Logo Design – It’s Pretty, But is it Functional?
Part 2: The Pathfinder Tool – Shape Modes
In my last blog post we talked about outlining strokes, which is a very simple yet critical part of designing in Illustrator. The next tool worthy of an entire blog post is the pathfinder tool. This tool is the end all be all of tools in Illustrator. It is the glue and scissors of the vector world. It is king, and it will make your life effortless.
If you have Illustrator, please download the zipped .ai file attached. If not, follow along with the images provided.
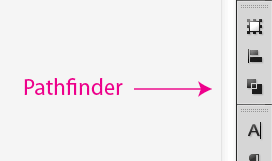
To open the pathfinder window on your computer, either go Window > Pathfinder or Shift+Command+F9. I always keep my pathfinder window in the my right tool bar; when closed it looks like this:
When you open it, this is what it looks like:
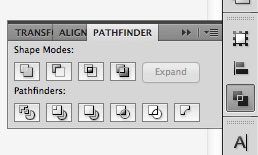
As you can see, there are four shape modes and six pathfinders. I primarily use the shape modes, but sometimes it is also necessary to use the pathfinders. Under shape modes, the options you have are “Unite,” “Minus Front,” “Intersect” and “Exclude.” We will start with “Unite.”
In the example provided, I have created a very simple house icon. To the untrained eye, this icon looks finished.
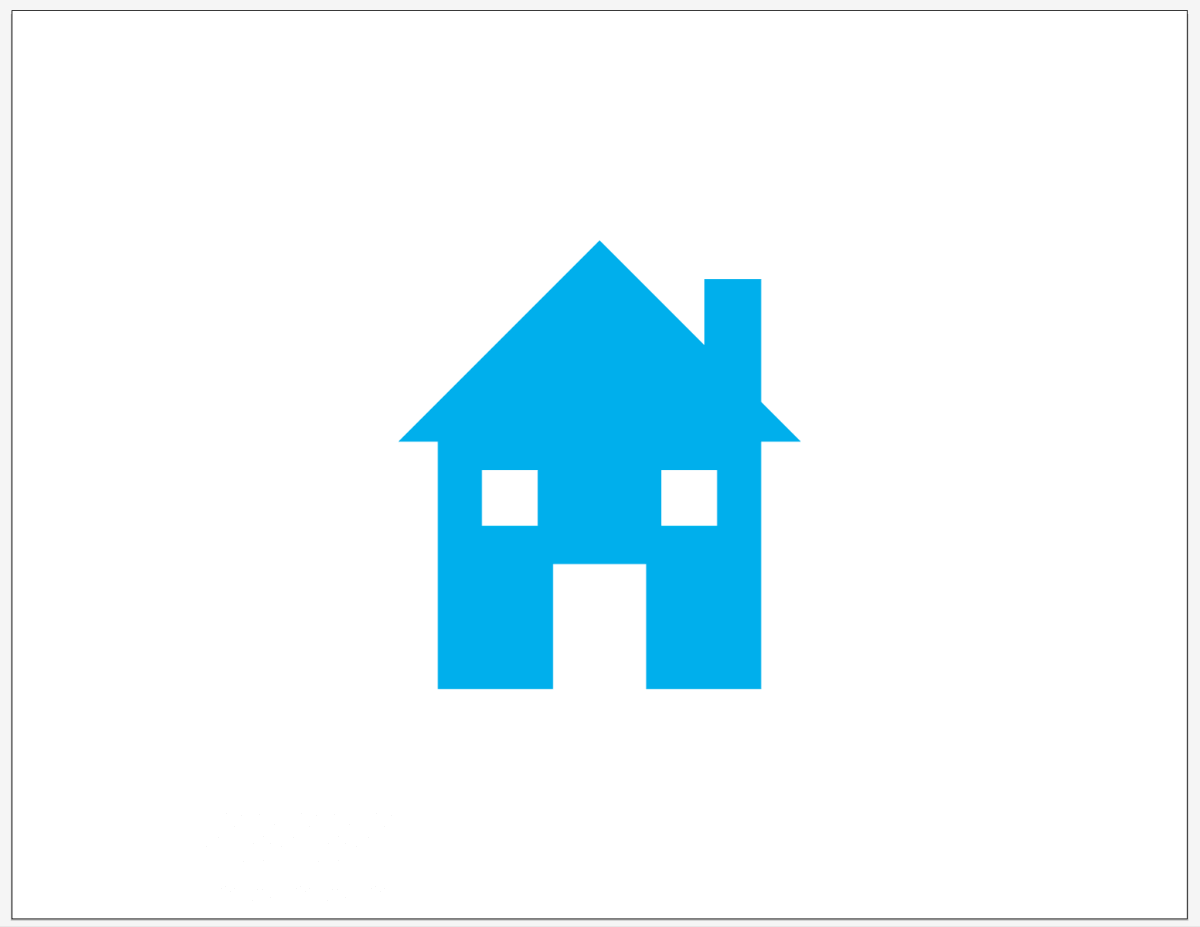
However, without finalizing it, we can see when a background color is added, there are flaws in the design.
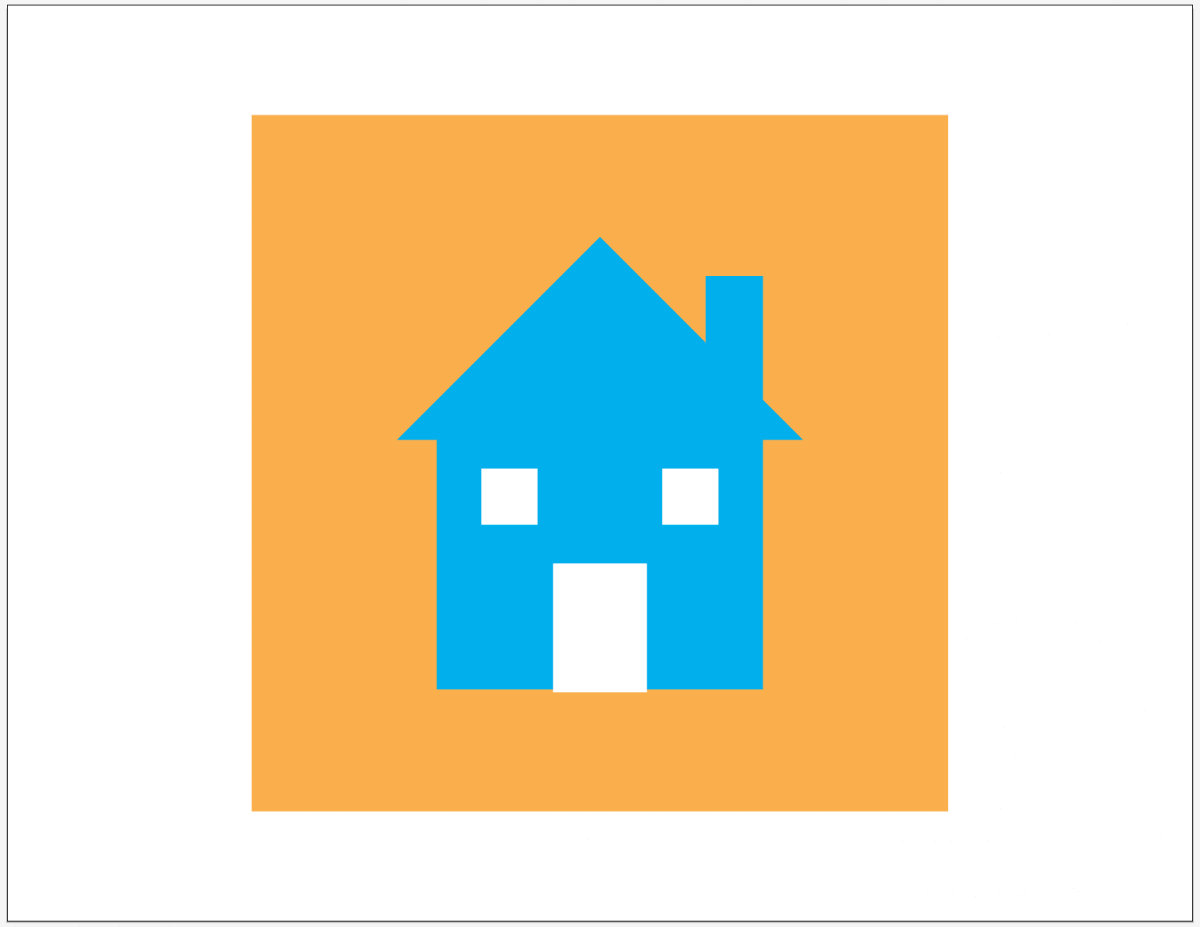
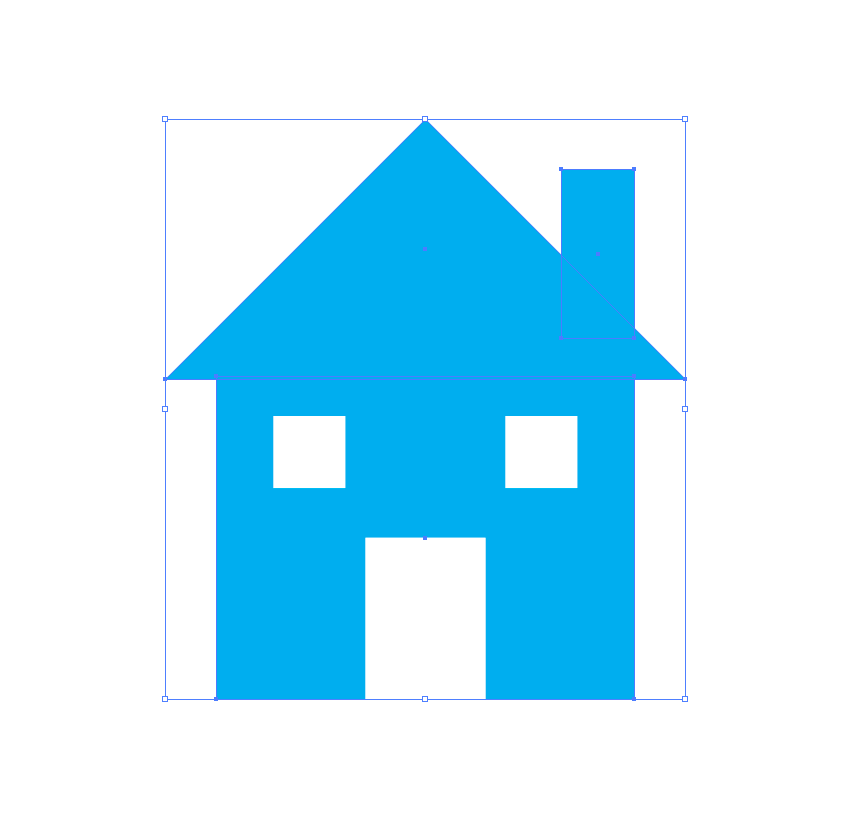
At best, this image can be a .jpeg on a white background. If you are looking to have a vector shape with a transparent background (.png), the house really needs to be made into one shape, queue pathfinder. Each image you create will follow a different process so you are able to see the big picture. For this little house icon, I would start by making all of the blue shapes one (they are there separate shapes currently for those who don’t have illustrator- chimney, roof and bottom). So first, select all three shapes (not the window or door).
Then click unite in the pathfinder tool, now the house is one blue shape.
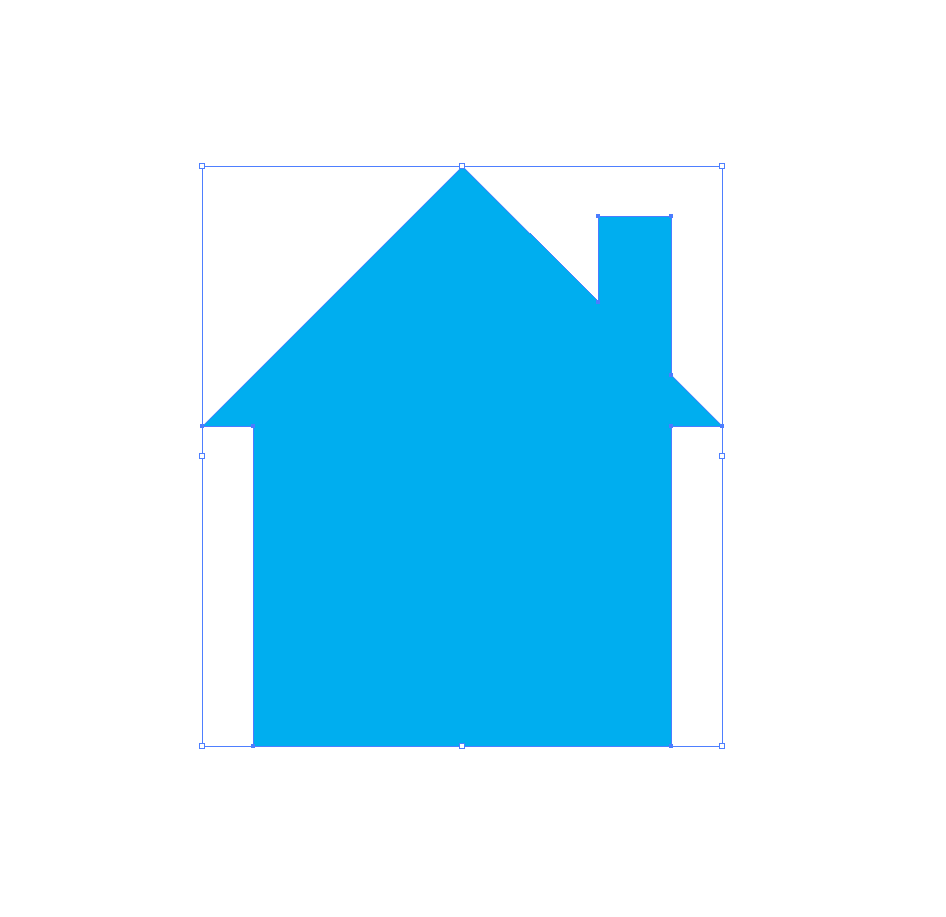
If you are asking where the windows & door went, with the house selected, type Shift + Command + {. This will move the house to the back and you should see your windows & door again.
Now it’s time to cut out the windows & door from the house. by selecting everything you want cut out from a shape and grouping the items (Command + G), you won’t miss anything. Once you have grouped the white shapes, select the grouped items and the blue house and click the second option on the pathfinder tool – Minus Front. Congratulations, you now have a solid and finalized shape. You can add a background color just to make sure you can see through your shape.

That looks more like it! You can now use your little house as a proper png if you need to. “Unite” & “Minus Front” are the options I use the most, however, “Intersect” & “Excluded” can be useful as well.
Please note the squares at the bottom of the art board for a short demonstration on how the other two shape modes work.

On the first set of squares, select both and hit “Intersect.” This is the outcome:

It cuts the intersecting shape from two shapes, you can see how this might be helpful when designing logos or any vector images.
Select the the second set of squares and hit “exclude,” and what you get looks like this:

“Exclude” does exactly what it says, it excludes the intersecting shape of two shapes. Again, another helpful shape mode.
You can use a variety of these options together to create the most usable logo possible, my only suggestion is to always have a working file and a finalized file just in case, recreating work is never fun. Now that you know the basics of the pathfinder tool, test it out and see how advanced you can be with your designs. Stay tuned for more posts in this series to help make your designs the best they can be! Up next week: clipping masks combined with the pathfinder tool.